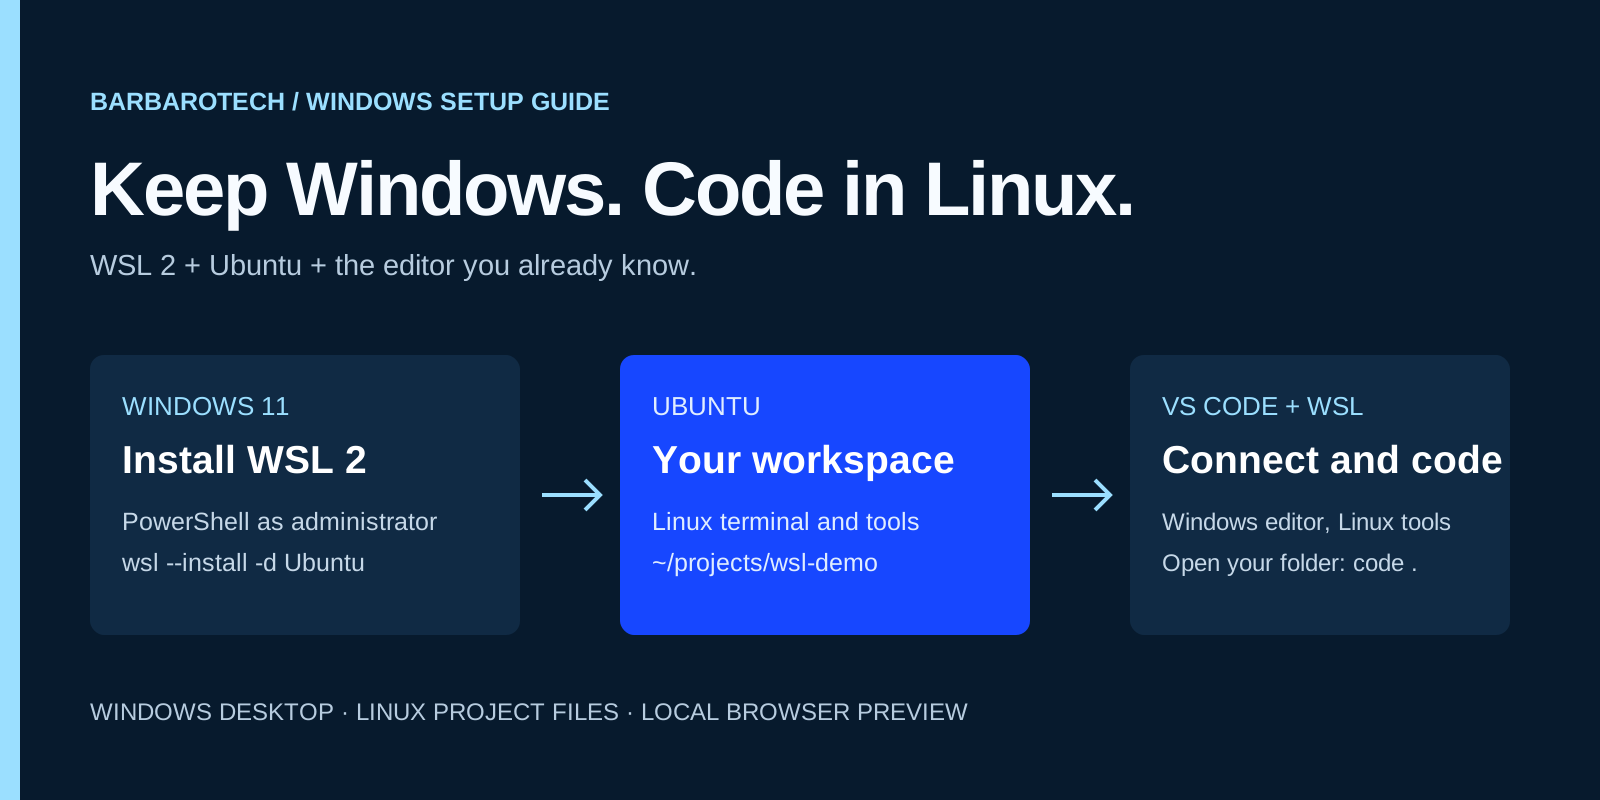
You can keep Windows as your desktop while using Linux for development. Windows Subsystem for Linux, or WSL, lets you install a Linux distribution alongside your Windows applications. This guide uses Windows 11, WSL 2, and Ubuntu, with the VS Code interface on Windows and your project files and development tools inside Linux.
Beginner · Windows 11
What you will learn
- Install Ubuntu with WSL 2 and confirm which version is running.
- Open a Linux project in a WSL-connected VS Code window.
- Run a local website inside Ubuntu and preview it in your Windows browser.
Before you start
- A Windows 11 PC with administrator access for installation and hardware virtualization available.
- Permission to install WSL and development tools on the computer; managed workplace devices may need administrator help.
- A new practice folder. If you already use WSL, check your existing distributions instead of reinstalling them.
Instructions checked against the linked official documentation on October 30, 2026. Interface labels and account access can change.
Why use WSL for coding?
WSL 2 runs a Linux kernel inside a lightweight, managed virtual machine. Combined with VS Code, it gives you a familiar editor with Linux terminals, tools, and project files. For projects that run on Linux servers, this can reduce differences between your development and deployment environments.
It is not a guarantee that local and production environments are identical. Runtime versions, configuration, services, and hosting settings still matter. The advantage is being able to work with the same kinds of tools and filesystem behavior earlier in the process.
| Benefit | What it means in practice |
|---|---|
| Linux tools | Run Bash scripts and Linux command-line utilities directly. |
| Similar development environment | Catch Linux-specific path, permission, and dependency problems earlier. |
| Case-sensitive filenames | Discover mistakes such as importing Header.tsx as header.tsx when working in the Linux filesystem. |
| Separate tool installations | Install Linux development tools separately from their Windows counterparts. |
| Windows convenience | Continue using Windows applications while your development tools run in Linux. |
Know which terminal each command belongs in.
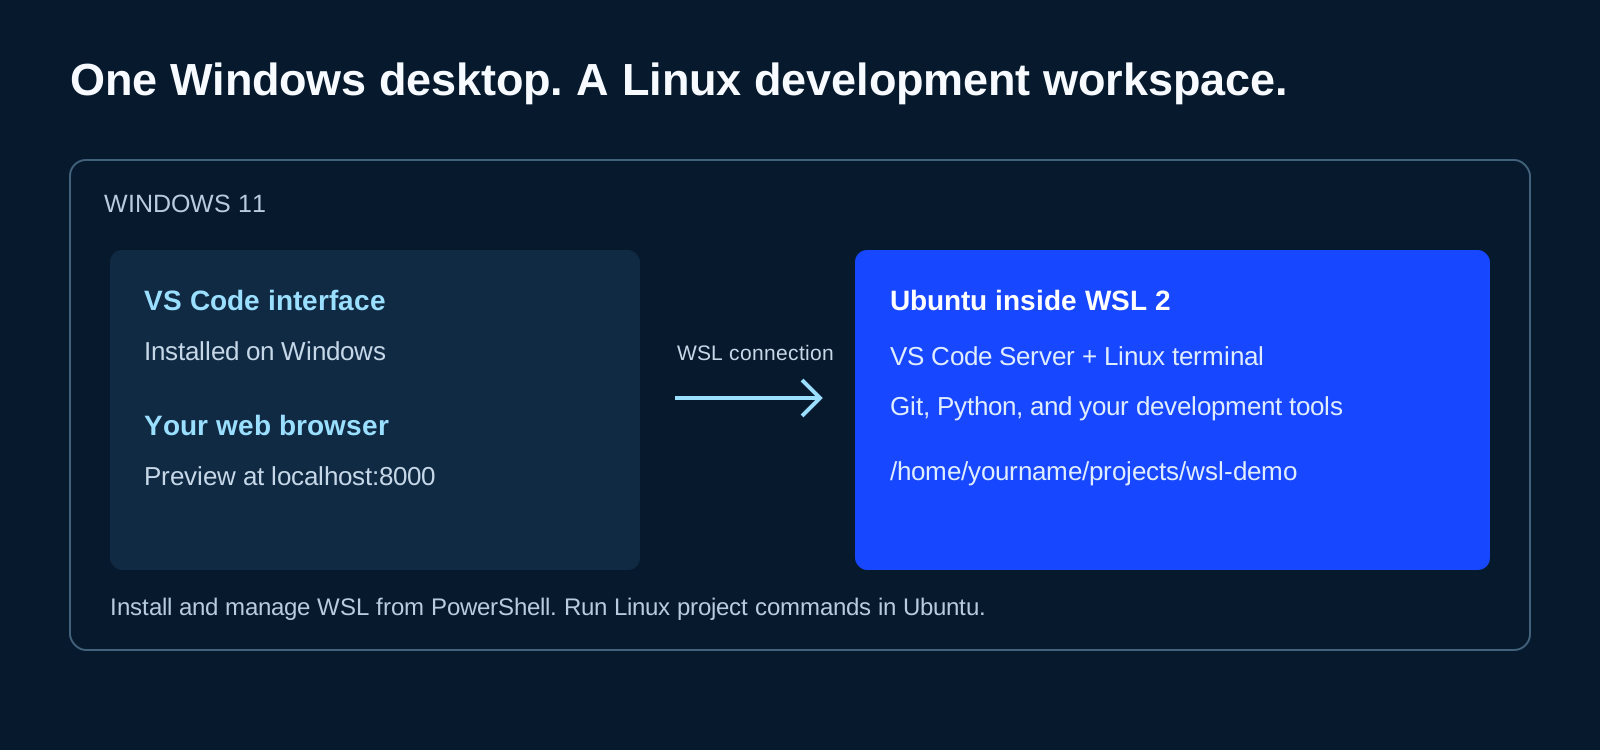
Use Windows PowerShell for the wsl commands that install, update, and list distributions. Use the Ubuntu terminal for apt, Linux project folders, and the Python web server. Windows Terminal can contain either shell, so check the selected tab rather than assuming every terminal is Ubuntu.
VS Code itself stays installed on Windows. The WSL extension connects that editor to a server inside Ubuntu. In a connected window, your integrated terminal and workspace tools run against the Linux project. Each command block below names the environment where you should run it.
1. Install WSL and Ubuntu.
Open PowerShell as administrator and run the installation command below. Restart the computer when prompted, then open Ubuntu from the Start menu and complete its initial setup. If you already have an Ubuntu distribution installed, check it before running installation again.
Create a Linux username and password when Ubuntu asks. These belong to Ubuntu and are separate from your Windows account. When entering the password, nothing appears on screen; that is normal. Keep the account details somewhere you can recover them.
wsl --install -d Ubuntu
Ubuntu opens from the Start menu, and its first-run Linux account setup is complete.
2. Update WSL and confirm the distribution version.
Back in Windows PowerShell, update WSL and list the installed distributions. New installations default to WSL 2. Find Ubuntu in the list and check the VERSION column; it should show 2. The name can vary if you installed a differently named Ubuntu edition.
The VERSION column describes whether that distribution uses WSL 1 or WSL 2. It is separate from Ubuntu's own release number. If an existing distribution shows 1, use Microsoft's documented conversion instructions and retain a backup of important work before converting it.
wsl --update
wsl --list --verboseYour Ubuntu distribution appears in the list with 2 in the VERSION column. If it does not, resolve that before continuing with this WSL 2 guide.
3. Update Ubuntu and install basic tools.
Open the Ubuntu terminal and run these commands there, one at a time. sudo asks for your Linux password when it needs administrator privileges. Review the proposed changes and confirm when prompted.
The first command refreshes the package list. The second installs available package upgrades. The third installs Git and Python for the example later in this guide. WSL updates and Ubuntu package updates are separate tasks: use wsl --update for WSL, and Ubuntu's package manager for Ubuntu packages.
sudo apt update
sudo apt upgrade
sudo apt install git python3git --version
python3 --versionGit and Python print version numbers from the Ubuntu terminal, rather than command-not-found errors.
4. Install VS Code on Windows and its WSL extension.
Install Visual Studio Code on Windows, then install the WSL extension published by Microsoft. Its extension identifier is ms-vscode-remote.remote-wsl. For this workflow, install the desktop editor on the Windows side, rather than installing a second Linux desktop copy inside Ubuntu.
During VS Code installation, enable Add to PATH if offered. This lets you open the editor with the code command from a terminal. Reopen your Ubuntu terminal after installing the editor if that command is not found.
The extension installs VS Code Server inside Ubuntu when it connects. Language tools and other workspace extensions may need to be installed in the WSL environment too. Follow an extension's Install in WSL option when appropriate; some interface extensions, such as themes, run on the Windows side.
VS Code is installed on Windows, and Microsoft's WSL extension is enabled.
5. Create your project inside Linux.
In the Ubuntu terminal, create a practice folder under your Linux home directory, enter it, and open it in VS Code. The dot in code . means the current folder. On the first connection, VS Code may download its WSL server components before the window is ready.
The tilde character in ~/projects refers to your Linux home directory. Your actual project path will resemble /home/yourname/projects/wsl-demo, where yourname is the Linux username you created. It is a path example, not a username to copy into your commands.
For Linux development, Microsoft recommends storing projects in the Linux filesystem. A path under /mnt/c/ crosses into the Windows filesystem and can add overhead, particularly for projects that read or write many small files. Windows and Linux filesystem defaults also differ around capitalization, so use consistent filenames and imports.
mkdir -p ~/projects/wsl-demo
cd ~/projects/wsl-demo
code ./home/yourname/projects/wsl-demoVS Code opens the wsl-demo folder from your Linux home directory, rather than a project under /mnt/c/.
6. Confirm that VS Code is connected to Ubuntu.
Look for the WSL connection indicator in VS Code's lower-left corner. It should identify the connected distribution. Then choose Terminal > New Terminal in that window and run the commands below.
uname -s should print Linux. pwd should show your project under /home/yourname/projects/wsl-demo. A WSL-connected window uses its Linux environment for the integrated terminal and workspace operations. The indicator, command output, and project path together make a better check than the appearance of the editor alone.
uname -s
pwdLinux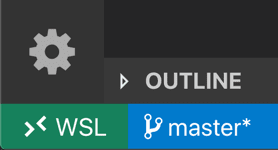
The status indicator identifies WSL, uname -s prints Linux, and pwd shows your Linux project folder.
7. Write a small page in VS Code.
In the Explorer panel for wsl-demo, create a file named index.html and paste the complete example below. Save the file. Its title appears in the browser tab, while the h1 and paragraph appear on the page.
Keep the filename exactly index.html. Linux filesystem capitalization matters: Index.html is a different name. The viewport line makes this simple page behave sensibly when you narrow the browser or view it on a smaller screen.
<!doctype html>
<html lang="en">
  <head>
    <meta charset="utf-8">
    <meta name="viewport" content="width=device-width, initial-scale=1">
    <title>My WSL Project</title>
    <link rel="icon" href="data:,">
  </head>
  <body>
    <h1>Coding in Linux with VS Code</h1>
    <p>This project is running inside Ubuntu on WSL.</p>
  </body>
</html>
8. Run the server in Ubuntu and preview it in Windows.
In VS Code's Ubuntu terminal, confirm you are still in the wsl-demo folder, then start the local Python server. The command serves files from the current directory. Keep this terminal running while you preview the page.
Open your Windows browser and visit http://localhost:8000. With the normal WSL localhost integration, Windows applications can reach a development server running inside the Linux distribution. localhost refers to your own computer; it is not a public website address.
You should see Coding in Linux with VS Code and the paragraph beneath it. Change the paragraph in VS Code, save, and reload the browser to confirm that your edit reaches the page. When finished, return to the terminal running the server and press Ctrl+C to stop it. Python's built-in server is for this local practice exercise, not production hosting.
pwd
python3 -m http.server 8000 --bind 127.0.0.1http://localhost:8000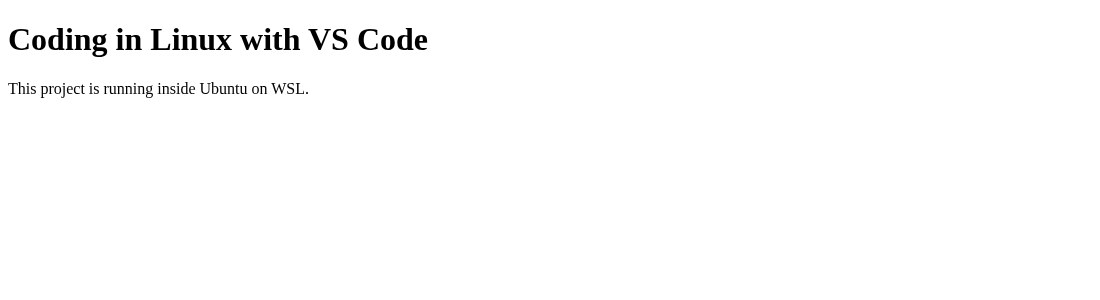
The page opens in the browser, a saved text change appears after reloading, and Ctrl+C stops the local server when you are done.
Keep your everyday workflow in one environment.
For this project, reopen Ubuntu, enter your Linux project folder, and run code . when you want to work again. Install and check the Linux versions of the development tools your project needs. A Windows installation of a tool does not mean you have configured its Linux counterpart.
You can enter explorer.exe . in the Ubuntu terminal to open the current Linux folder in Windows File Explorer through WSL's supported integration. Keep the working copy in the Linux filesystem rather than duplicating it in two places and wondering which copy you edited.
If you use Git, configure its author identity in the Linux environment as needed and review changes there. Our VS Code, Codex, and GitHub guide walks through that next. You do not need to configure a database, containers, or a deployment service to finish this WSL exercise.
explorer.exe .If something does not work, check the environment first.
Keep the exact error message and note whether it came from Windows PowerShell, the Ubuntu terminal, or a WSL-connected VS Code window. That distinction often explains why a command is unavailable or a project is running in the wrong place.
- WSL installation fails: confirm Windows updates, administrator access, and the virtualization requirements in Microsoft's installation and troubleshooting instructions. A managed device may require your administrator's help.
- Apt or sudo is not recognized: you are probably using PowerShell or another Windows shell. Open Ubuntu before running those commands.
- code . is not found: confirm the Windows VS Code installation is on PATH, reopen the Ubuntu terminal, or use VS Code's WSL: Connect to WSL command and open the Linux folder from there.
- The editor has no WSL indicator: reconnect or reopen the folder in WSL before treating the integrated terminal as Linux.
- The project path begins with /mnt/c/: that is a mounted Windows location. For this exercise, use the folder under ~/projects that you created in Ubuntu.
- The browser shows a directory listing: make sure the server started in wsl-demo and the saved file is named index.html with the correct capitalization.
- The browser cannot connect: check that the server terminal is still running, the port in the URL matches the command, and port 8000 is not already in use. If networking policies or a VPN interfere, use Microsoft's WSL networking guidance.
- An update or conversion is needed: keep a backup of important project data and follow the official steps. Do not use wsl --unregister as a repair shortcut; it removes the distribution and its associated data.
Official references
Use these pages for current platform details and updates to the interfaces shown in this guide.